Are you a company that has a large number of courses available and need a little help organizing them? DigitalChalk has a category feature that allows you to quickly, and easily, organize them all.
There are two steps in setting up categories and assigning course offerings in the categories.
Creating a category
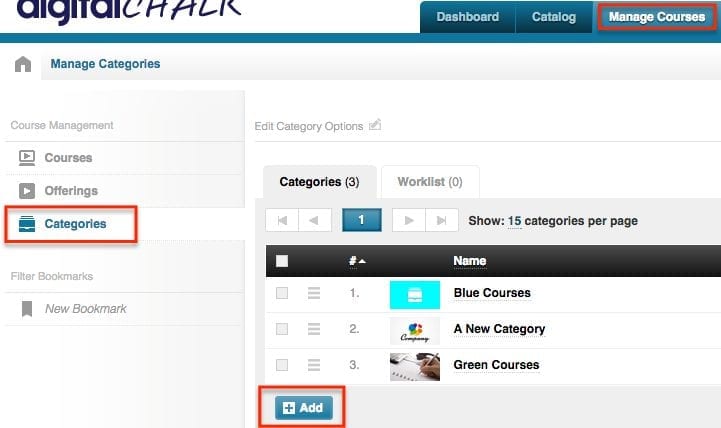
- Go to the ‘Manage Courses’ tab.
- Select ‘Categories’ from the left side menu.
- You will be taken to a page with an ‘Add’ button. Click on this and then go through the process of creating a new category. You will be given the option to name the category, add a description, choose a color, and add an image.
Assigning an offering to a category
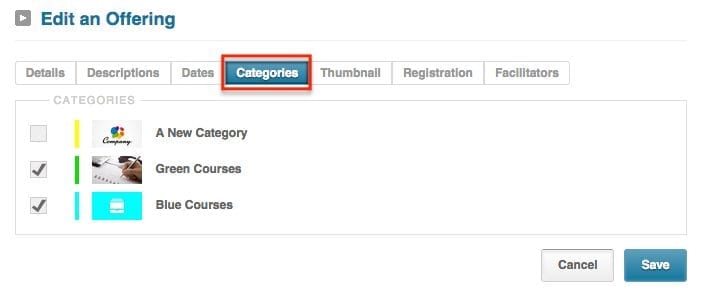
- Remain under the ‘Manage Courses’ tab and select the ‘Offerings’ from the left side menu.
- Click on the offering title that you want to assign to a category.
- Click on the ‘Category’ tab, and then select the appropriate category (or categories – you can assign one offering to multiple).
- Click the ‘Save’ button and now you’re finished.
Want to preview how this would look for your students? Click over to your catalog tab and you will see exactly what they will see (unless you have created catalog rules that would show students different courses).