As an online instructional designer and eLearning professional, you can never have too many authoring tools to choose from. We’ve found a great one called Visme. Visme is an online authoring tool that allows you to create eLearning projects such as presentations, infographics, banner ads, reports and much more. Choose from tons of templates that are completely customizable.
Within your project, you can add images, media, icons, graphics, fonts, and color schemes. After you have created your customized eLearning project, you can easily publish and share it with anyone you’d like.
We’ve put together a brief tutorial on how to create your first eLearning project with Visme. Let’s take a look.
- Log into your Visme account, or create one here.
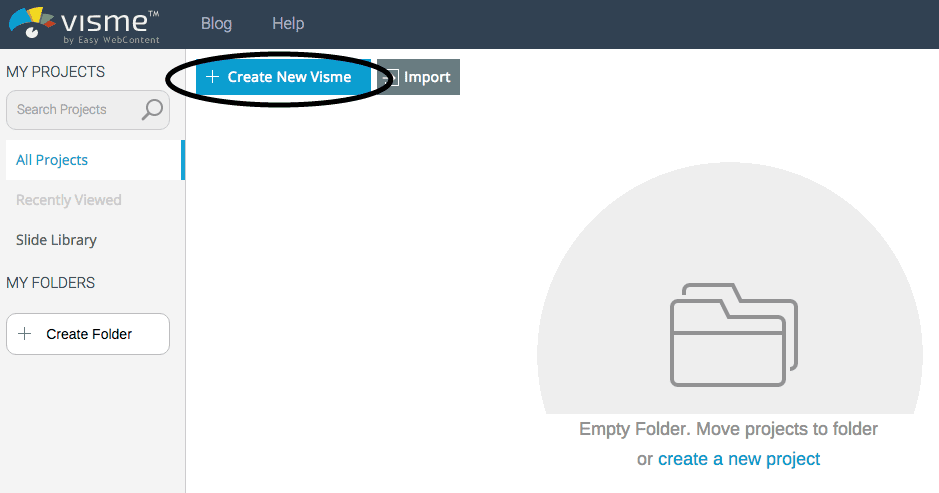
2. Once logged in, click “Create New Visme” on your dashboard.

3. Select your desired project type and template. Choose from a presentation, infographic, banner ad or custom. For this example, we chose an infographic.

4. Your template will automatically open. On the right side, you have tools to edit your template (text, shapes, images, and more).
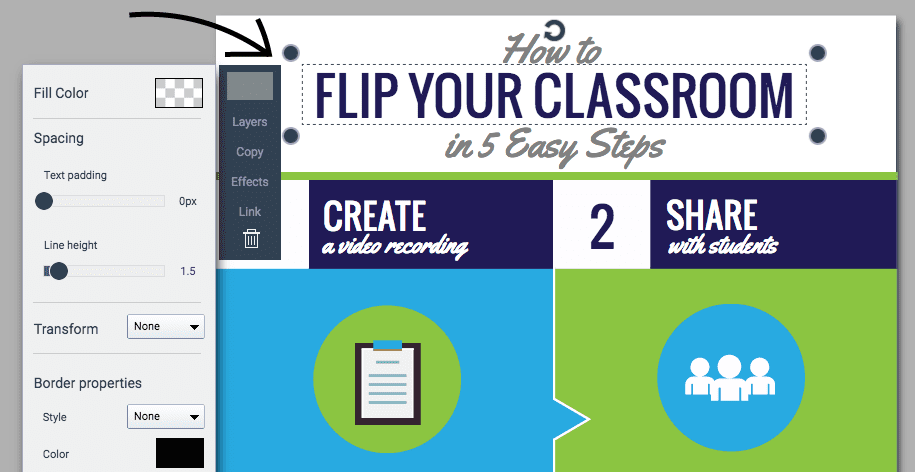
5. Just click on any of the tools to add to your template. If you have an existing text box you want to edit, just click on it and edit the text, color, and size.

6. You can customize the template color scheme by clicking on the existing boxes and shapes. A window will appear with edit options. Click on the color swatch, then the “+” symbol. You can add a custom Hex code to match your branding.
7. To publish your project, click “publish” in the center of the top tool bar. A box will appear with options to share, embed or download.
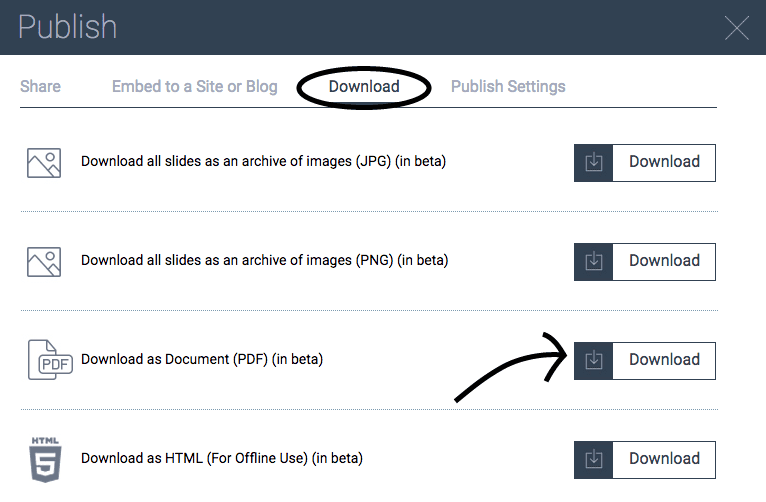
8. For this example, we chose to download as a PDF. Click the “Download” tab and then the “Download” button next to “Download as Document (PDF).” That’s it! The PDF will automatically download within your browser and you can save to your computer.
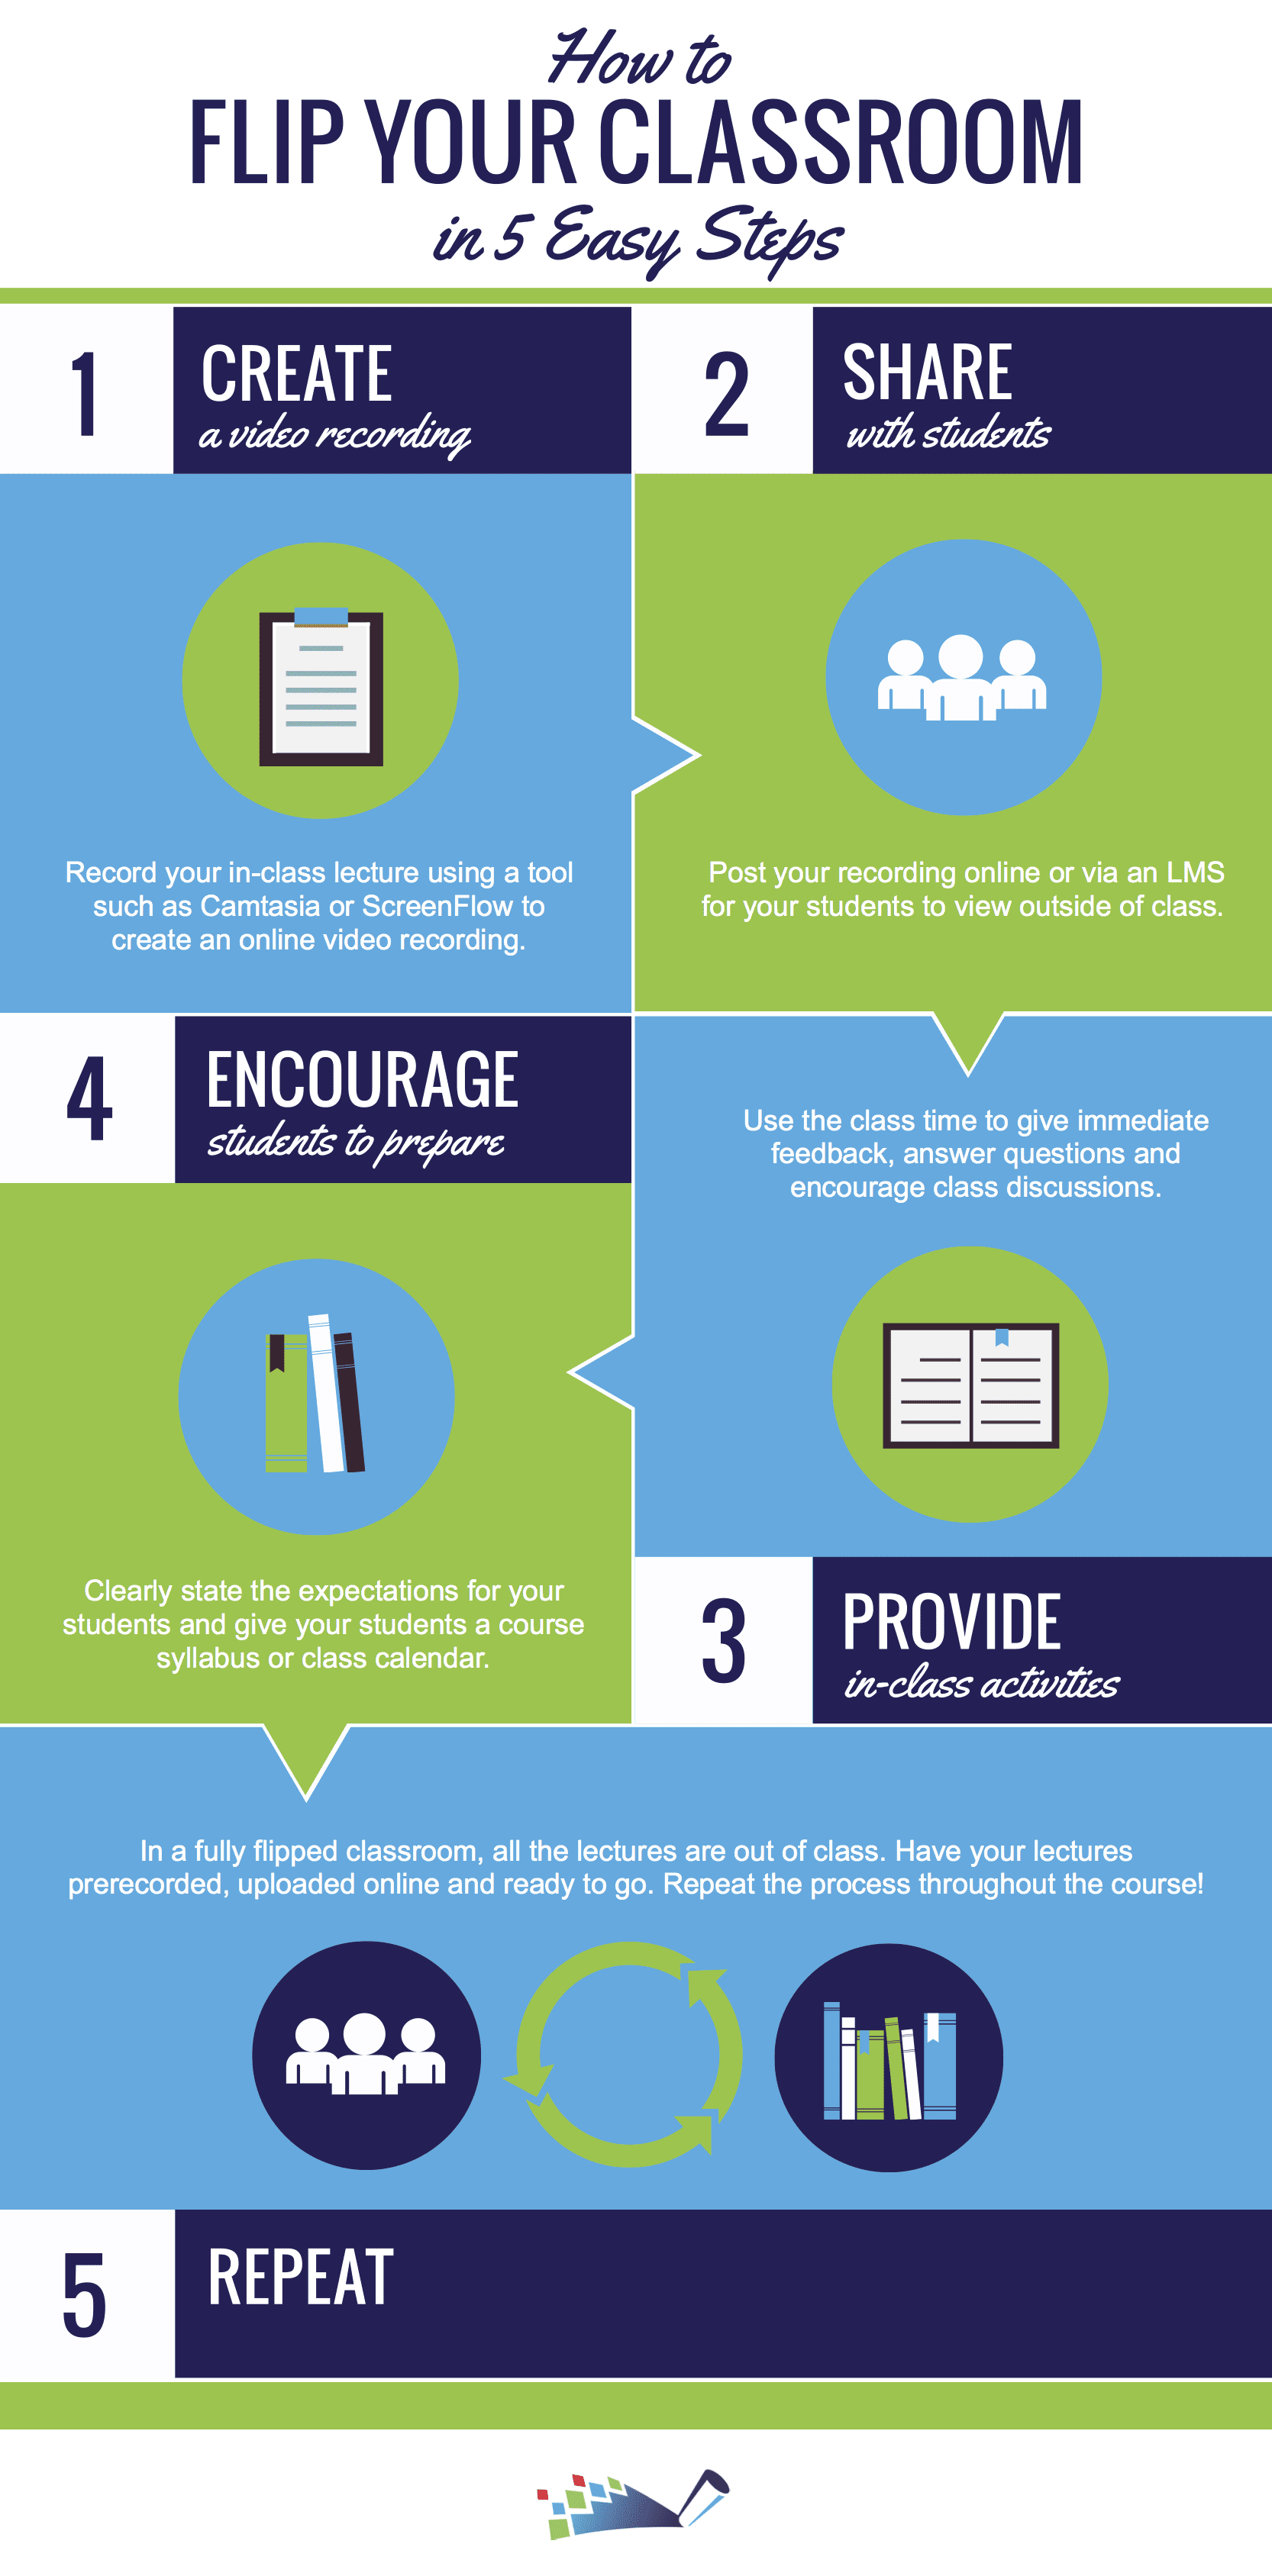
Check out our finished eLearning project on how to flip your classroom below.
What do you think? Would you use Visme to help create your online learning content? Share with us your thoughts in the comments below!
