Adding users will be one of the first things you do when you get your DigitalChalk account set up (along with creating your courses).
There are a couple of ways to manually add users to your DigitalChalk organization.
Mass uploading users
If you have a Business or Enterprise account you will have access to this feature. This feature is ideal for organizations that need to add a large number of users at the same time.
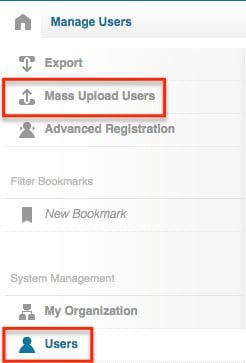
- Go to the ‘Administration’ tab and select ‘Users’ from the left menu.
- Above the left menu you will see a ‘Mass Upload Users’ option, select it and a window will open.
- Click ‘Downland Template’ – this template is an Excel spreadsheet that has certain information to fill in for the users, such as: First and last name, Email, Password, Tags (not necessary to fill in), Reset Password (True will let them reset it once they have entered the given password for the first time, False will not), and Locale (you can choose from English or Spanish).

- Once you have filled in the information, save the Excel spreadsheet and you are ready to upload it into DigitalChalk.
Individually adding users
Another option is to add users one by one – this feature is available to every organization. To add individual users you will want to:
- Go to the ‘Administration’ tab and select ‘Users’ from the left menu.
- At the bottom, you will notice that there is an ‘Add’ button to select. Once you have selected it, a new window will open up with all of the fields to fill out for the new user.
- Need to add a user field to fill out for the user that isn’t there? Use the DigitalChalk user field layout to add a unique user field. The required fields will have asterisks next to the field name.
- Now that you have filled in the appropriate field, you are ready to click the ‘Save’ button and you have created your user.
*Helpful hint: With our notifications feature you can now send emails to the users you just created automatically. The email will let them know what their login information is (email and password) so that they can immediately begin. To set this up you will:
- Go to the ‘Administration’ tab and select ‘Notifications’ from the left side menu.
- Select the ‘Add’ button and in the new window that appears you will want to select the ‘Override’ tab.
- Click on the ‘User Welcome Email’ option.
- Select source under the ‘Event Source’ section and choose ‘Administrator Initiated’.
- Add the password and email to the message body. To do this you will want to add two variables so that this information is automatically generated in each users email.


6. After setting up you can go ahead and click the ‘Save’ button and the welcome email will be sent out for every new user that is created by an administrator.